Step 1
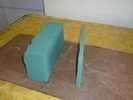 You will need a sharp, long-bladed knife, a ruler and a chopping board. Score a 10mm deep line around the narrow side of the Oasis block. Cutting downwards, remove the layer and put it to one side. You will need it again shortly.
Step 2
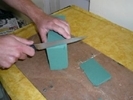 Cut the two wedge-shaped pieces, referred to in the diagram as parts B and E. The thick end of the wedges should be 20mm deep. Both cuts should be made from the corners of the same side and angled inwards, so that the main block becomes shaped like the basket. It is useful to score cut lines before removing the wedges. In the diagram the main block is referred to as part A.
Step 3
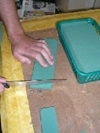 Take the thin layer that you removed in Step 1. Cut it lengthways, to give you two strips, one 65mm wide (part C) and one 45cm wide (part D). Cut two wedge-shaped pieces from either end of part C. The thick end of the wedges should be 20mm deep. As before, both cuts should be made from the corners of the same side and angled inwards.
Step 4
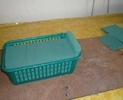 Place the main block (part A) in the basket, aligning its tapered ends with the basket’s tapered ends. Push wedge B between one end of the main block and the end of the basket. Trim the top, so the surface of the wedge sits flush with the surface of the main block. Slide block and wedge sideways, so they butt up against the bottom of one basket side. You will notice that the surface of the oasis aligns with the internal lip of the basket. This is important, as it sets the depth of clay.
Step 5
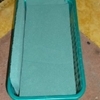 Insert part C to fill the wider gap, between the main block and the basket side. With your fingers along the top edge, push the strip downwards to its furthest point. It should fit flush with the surface of the main block.
Step 6
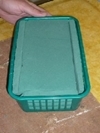 Insert part D to fill the gap along the other side. With your fingers along the top edge, push the strip downwards to its furthest point.
Step 7
Insert part D to fill the gap along the other side. With your fingers along the top edge, push the strip downwards to its furthest point. Take wedge E and cut it in half, from its shortest side to its narrowest point, to give you two, roughly equal sized, thinner wedges. Insert the wedges to fill the gap between the main block, and part C. Push them down until they fit snugly. Trim the tops of the wedges, and part D, so that all oasis parts sit flush with the surface of the main block.
Step 8
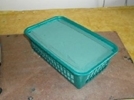 Finally, turn the basket upside down and give it a shake. All of your Oasis parts should stay in place. If they do, your tracking basket is ready for use. If a part falls out, don’t despair; re-pack the oasis and cut a thin wedge from your off-cuts and plug any gaps. Remember to saturate the Oasis before you attempt to cover it in clay.
Get your FREE Mink Raft Plans today
 The award-winning GWCT Mink Raft was developed both as a means of detecting mink, and as a favourable trap site.
What you can download for free
✓ Mink Raft Guidelines
✓ Instructions & Plans
✓ How to Build the GWCT Mink Raft
Download now >